
Key takeaways
- Broken tiles can be replaced one at a time without removing the whole backsplash.
- A new backsplash in a small kitchen is a manageable project when the wall and counters are protected and prepared.
- Outlets in the backsplash need box extenders so covers sit flush with the new tile; that is electrical work, which Texas licenses, so ask who will do it.
- Peel-and-stick works best on smooth, clean, sound walls, and some products aren’t suited to the heat behind a range.
- The joint where the backsplash meets the counter should be caulk, not grout.
In this guide
Repair, refresh or replace
Start with what you have. If the tile is fine and you just dislike the grout, or a few tiles are cracked, a repair or refresh may be all it needs. If you want a different look, a new backsplash changes the kitchen without a remodel. The options, from smallest to largest:
- Clean, recaulk and seal the existing tile so the joints look new.
- Replace a few cracked or chipped tiles, using spares or a close match.
- Regrout in a new color, which changes the look more than people expect.
- Apply a peel-and-stick product over a smooth wall for a lighter change.
- Remove the old backsplash and install new tile.
Replacing broken tiles, including behind the stove
A backsplash can be repaired without removing all the tile. The grout around a broken tile is cut out, the tile is broken out carefully, the adhesive behind it is scraped flat, and a new tile is set and grouted to match. The hard part is matching: leftover tiles from the original job are ideal, so check the garage, the attic and the cabinet above the refrigerator. Tile and grout repair covers matching discontinued tile and grout color.
A cracked tile behind the stove is a common repair. The range has to come forward to give room to work, with the floor protected as it slides. If it is electric, it can be unplugged. If it is gas and the connector won’t let it come forward far enough, disconnecting and reconnecting the gas line is work for a licensed professional, and we’ll say so before starting. It’s also worth asking why the tile cracked: heat, an impact, or movement in the wall behind it.
Installing a new tile backsplash
A small kitchen is a good place for a new tile backsplash, and it’s work we do under everyday projects. The steps that make it last:
- Protect the counters, sink and floor before anything comes off the wall.
- Remove the old backsplash and repair the wall behind it so it is flat and sound.
- Bring the outlets out flush with the new tile surface with box extenders, so the covers sit tight. That step is electrical work, which Texas licenses: ask who will do it and whether they are licensed, and we’ll tell you how we handle it on your job.
- Lay out the tile so cut pieces land in the least visible places and the pattern centers on the range or sink.
- Set the tile, then grout once the adhesive has cured.
- Finish the exposed edges where the tile stops, with a trim piece or a finished-edge tile.
- Caulk the joint along the counter and at inside corners, where movement would crack grout.
- Plan any new wiring before the tile goes up. Adding or moving outlets, or running power to new under-cabinet lighting, belongs with a licensed electrician, so that work comes first and the tile goes around it.
Thinking about a new backsplash? Tell Daniel about it
Peel-and-stick, done properly
Peel-and-stick backsplash can look good when it is installed with care. Most failures come from the surface underneath, not the product. A proper installation starts with a clean, smooth, sound wall: grease removed, glossy paint dulled, holes filled. Panels are aligned to a level line rather than the counter, which is rarely straight, and cut neatly around outlets with power off.
Check the product’s heat rating before it goes behind a range, especially a gas range. Some aren’t made for that spot. Also know that peel-and-stick can pull paint and drywall paper off when it is removed later, so it is better seen as a long-term finish than an easily reversible one. It doesn’t go over existing tile with deep grout lines unless the surface is made flat first.
The joint along the counter
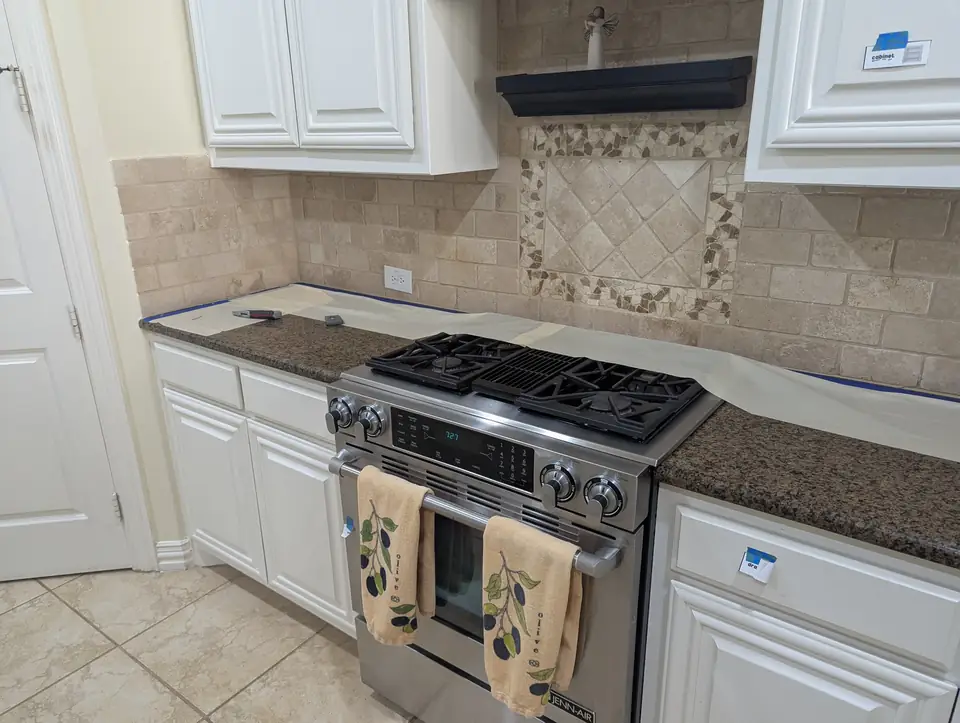
The line where the backsplash meets the countertop moves slightly as the house and the counter shift, so it should be sealed with a flexible caulk, not grout. When that joint opens up, water from the sink and counter runs down behind the cabinets. In Daniel’s backsplash and sink caulking project, the counters were protected with tape and paper, the old caulk was removed, and fresh beads were run along the joints.
When should you recaulk a tub, shower or sink? explains why caulk over old caulk fails and what a good bead looks like.
Before the visit
Decide how far the backsplash will run: just behind the counters, up to the bottom of the upper cabinets, or full height behind the range. Have the tile on site or a link to it, along with the trim or edge pieces. Note whether the range is gas or electric and whether any outlets need to move.
Send photos of the wall, the outlets and the range area through Request service, along with your tile choice. We’ll tell you whether it looks like a repair or a new installation, and flag any electrical or gas work that needs a licensed pro first.